
How to Create Virtual Machine using virt-install Command
The virt-install command is what we are going to use for creating a virtual machine in a KVM environment. This tool can be used in both interactive and non-interactive mode. To create Virtual Machine using virt-install command, the KVM need to be installed on your host machine. Read the article install KVM in Linux. Read more about virt-install command examples and usages.
The virt-install options we are going to use for creating a VM.
- n Specifying the name of virtual machine.
- description VM description. Example: App server, database VM, etc.
- os-type Operating system type: Linux, Unix, or Windows.
- os-variant Distribution type for the above os-type. For example, for Linux, it can be rhel8.0, centos8.0, ubuntu20.4, etc. For the Windows OS, this could be win2k19, win2k22, win10, win11
- ram Memory for the VM in MB
- vcpu Total number of virtual CPUs for the VM.
- disk path The virtual disk of the VM where the VM image files is stored.
- graphics none This instructs virt-install to use a text console on VM serial port instead of graphical VNC window.
- location Indicates the location of installation image. You can specify the NFS or http (location=http://.com/pub/rhel6/x86_64/).
- network The VM network connection.
Create Virtual Machine using virt-install
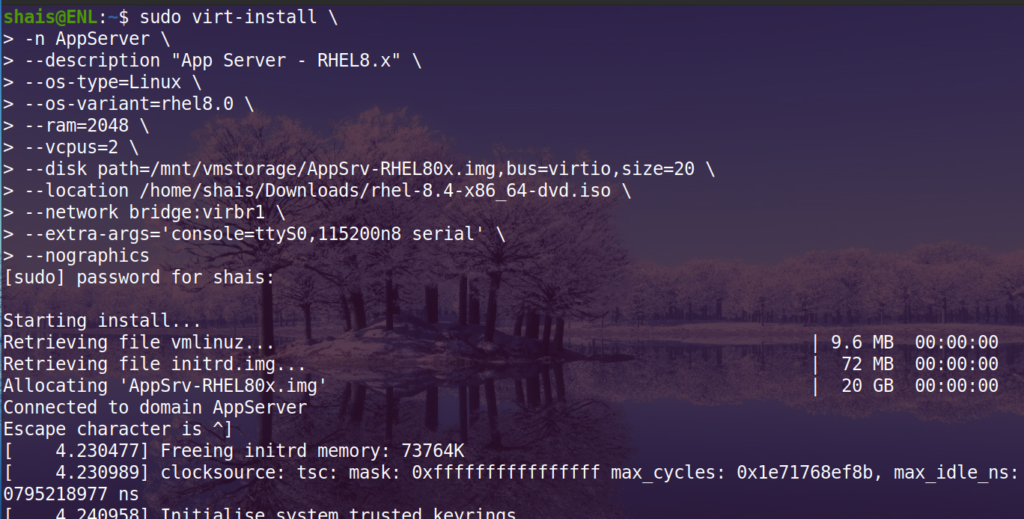
Let’s create and launch a Red Hat Enterprise Linux 8.x installation using virt-install command.
virt-install \
-n AppServer \
--description "App Server - RHEL8.x" \
--os-type=Linux \
--os-variant=rhel8.0 \
--ram=2048 \
--vcpus=2 \
--disk path=/mnt/vmstorage/AppSrv-RHEL80x.img,bus=virtio,size=20 \
--location /home/shais/Downloads/rhel-8.4-x86_64-dvd.iso \
--network bridge:virbr1 \
--extra-args='console=ttyS0,115200n8 serial' \
--nographics
You can use the “virt-viewer –connect qemu:///vm” to open up the VM in a new window if you are installing server with GUI.
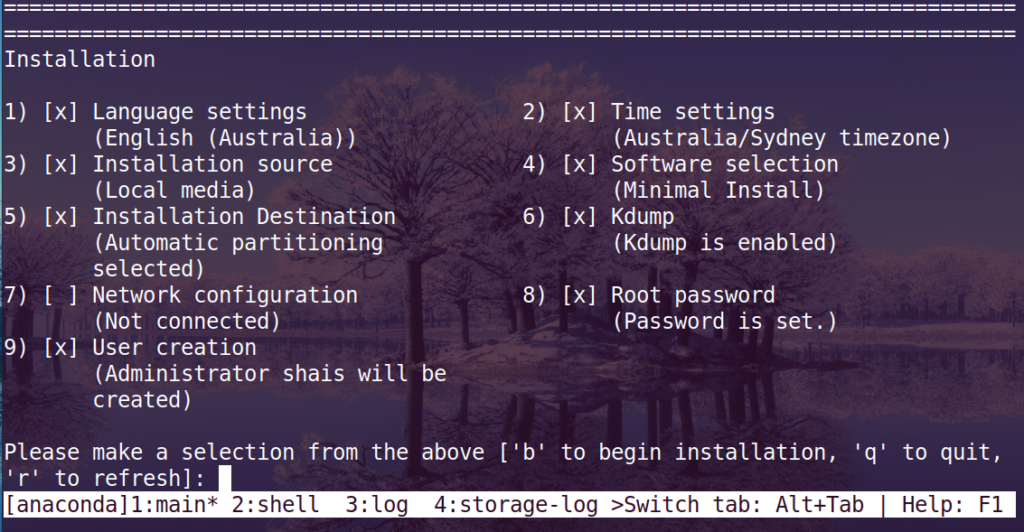
Once the virt-install command has run successfully, continue to complete the Linux installation. Select the the server features and settings:
- Language settings.
- Time settings.
- Installation source.
- Software selection.
- Installation Destination.
- Kernel Dump.
- Network configuration.
- Root password.
- User creation.
And finally press b to begin the installation and follow up the rest of the Linux installation to finalise and complete it.
Installation complete. Press ENTER to quit:
Done!
Read more about Linux command line in our website and please let us know if you have any issue with this article via comment section.