
The virt-install Command Examples and usage in manual is clear and understandable. But here you see some real project virt-install command examples.
NAME
virt-install – provision new virtual machines
SYNOPSIS
virt-install [OPTION]…DESCRIPTION
virt-install is a command line tool for creating new KVM, Xen, or Linux container guests using the “libvirt” hypervisor management library. See the EXAMPLES section at the end of this document to quickly get started.
virt-install tool supports graphical installations using (for example) VNC or SPICE, as well as text mode installs over serial console. The guest can be configured to use one or more virtual disks, network interfaces, audio devices, physical USB or PCI devices, among others.
The installation media can be local ISO or CDROM media, or a distro install tree hosted
remotely over HTTP, FTP, or in a local directory. In the install tree case “virt-install“
will fetch the minimal files necessary to kick off the installation process, allowing the
guest to fetch the rest of the OS distribution as needed. PXE booting, and importing an
existing disk image (thus skipping the install phase) are also supported.
Given suitable command line arguments, "virt-install” is capable of running completely
unattended, with the guest ‘kickstarting’ itself too. This allows for easy automation of guest installs. This can be done manually, or more simply with the --unattended option.
Many arguments have sub options, specified like opt1=foo,opt2=bar, etc. Try --option=? to
see a complete list of sub options associated with that argument, example: virt-install
--disk=?
Most options are not required. If a suitable --os-variant value is specified or detected,
all defaults will be filled in and reported in the terminal output. If an --os-variant is not specified. minimum required options, --memory, guest storage (--disk or --filesystem), and an install method choice.
CONNECTING TO LIBVIRT
--connect URIConnect to a non-default hypervisor. If this isn’t specified, libvirt will try and choose the most suitable default.
Some valid options here are:
qemu:///systemFor creating KVM and QEMU guests to be run by the system libvirtd instance. This is the default mode that virt-manager uses, and what most KVM users want.
qemu:///sessionFor creating KVM and QEMU guests for libvirtd running as the regular user.
xen:///
For connecting to Xen.
lxc:///For creating Linux containers.
GENERAL OPTIONS
General configuration parameters that apply to all types of guest installs.
-n NAME
--name NAMESyntax: -n, --name NAME
Name of the new guest virtual machine instance. This must be unique amongst all guests
known to the hypervisor on the connection, including those not currently active. To re-define an existing guest, use the virsh(1) tool to shut it down (‘virsh shutdown‘) & delete (‘virsh undefine‘) it prior to running “virt-install“.
--memory OPTIONSMemory to allocate for the guest, in MiB. This deprecates the -r/–ram option. Sub options are available, like ‘memory’, ‘currentMemory’, ‘maxMemory’ and ‘maxMemory.slots’, which all map to the identically named XML values.
Back compat values ‘memory’ maps to the <currentMemory> element, and max memory maps to the <memory> element. To configure memory modules which can be hot unplugged see --memdev description.
Use --memory=? to see a list of all available sub options. Complete details at
<https://libvirt.org/formatdomain.html#elementsMemoryAllocation>
--memorybacking OPTIONSThis option will influence how virtual memory pages are backed by host pages.
Use --memorybacking=? to see a list of all available sub options. Complete details at
<https://libvirt.org/formatdomain.html#elementsMemoryBacking>
--arch ARCHRequest a non-native CPU architecture for the guest virtual machine. If omitted, the host CPU architecture will be used in the guest.
--machine MACHINEThe machine type to emulate. This will typically not need to be specified for Xen or KVM, but is useful for choosing machine types of more exotic architectures.
--metadata OPT=VAL,[...]Specify metadata values for the guest. Possible options include name, uuid, title, and description. This option deprecates -u/--uuid and –-description.
Use --metadata=? to see a list of all available sub options. Complete details at
https://libvirt.org/formatdomain.html#elementsMetadata
--events OPT=VAL,[...]Specify events values for the guest. Possible options include on_poweroff, on_reboot, and on_crash.
Use --events=? to see a list of all available sub options. Complete details at
https://libvirt.org/formatdomain.html#elementsEvents
--resource OPT=VAL,[...]Specify resource partitioning for the guest.
Use --resource=? to see a list of all available sub options. Complete details at
https://libvirt.org/formatdomain.html#resPartition
--sysinfo OPT=VAL,[...]Configure sysinfo/SMBIOS values exposed to the VM OS.
Some examples:
--sysinfo host
Special type that exposes the host’s SMBIOS info into the VM.
--sysinfo emulateSepcial type where hypervisor will generate SMBIOS info into the VM.
--sysinfo bios.vendor=custom or --sysinfo smbios,bios.vendor=custom
The default type is smbios and allows users to specify SMBIOS info manually.
Use --sysinfo=? to see a list of all available sub options.
Complete details at https://libvirt.org/formatdomain.html#elementsSysinfo and
https://libvirt.org/formatdomain.html#elementsOSBIOS for smbios XML element.
Pass options directly to the qemu emulator. Only works for the libvirt qemu driver. The option can take a string of arguments, for example:
--qemu-commandline="-display gtk,gl=on"Environment variables are specified with ‘env’, for example:
--qemu-commandline=env=DISPLAY=:0.1Complete details about the libvirt feature: https://libvirt.org/drvqemu.html#qemucommand
--vcpus OPTIONSNumber of virtual cpus to configure for the guest. If ‘maxvcpus‘ is specified, the guest will be able to hotplug up to MAX vcpus while the guest is running, but will startup with VCPUS.
CPU topology can additionally be specified with sockets, cores, and threads. If values are omitted, the rest will be autofilled preferring sockets over cores over threads.
‘cpuset‘ sets which physical cpus the guest can use. “CPUSET” is a comma separated
list of numbers, which can also be specified in ranges or cpus to exclude. Example:
| 0,2,3,5 | Use processors 0,2,3 and 5 |
| 1-5,^3,8 | Use processors 1,2,4,5 and 8 |
If the value ‘auto’ is passed, virt-install attempts to automatically determine an optimal cpu pinning using NUMA data, if available.
Use --vcpus=? to see a list of all available sub options. Complete details at
https://libvirt.org/formatdomain.html#elementsCPUAllocation
--numatune OPTIONSTune NUMA policy for the domain process. Example invocations
--numatune 1,2,3,4-7
--numatune 1-3,5,memory.mode=preferred
Specifies the numa nodes to allocate memory from. This has the same syntax as “--vcpus” option. mode can be one of ‘interleave’, ‘preferred’, or ‘strict’ (the default). See ‘man 8 numactl’ for information about each mode.
cpuset=
Use --numatune=? to see a list of all available sub options. Complete details at
https://libvirt.org/formatdomain.html#elementsNUMATuning
--memtune OPTIONSTune memory policy for the domain process. Example invocations.
--memtune 1000
--memtune
hard_limit=100,soft_limit=60,swap_hard_limit=150,min_guarantee=80
Use --memtune=? to see a list of all available sub options. Complete details at
https://libvirt.org/formatdomain.html#elementsMemoryTuning
--blkiotune OPTIONSTune blkio policy for the domain process. Example invocations.
--blkiotune 100
--blkiotune weight=100,device.path=/dev/sdc,device.weight=200
Use --blkiotune=? to see a list of all available sub options. Complete details at
https://libvirt.org/formatdomain.html#elementsBlockTuning
--cpu MODEL[,+feature][,-feature][,match=MATCH][,vendor=VENDOR],...Configure the CPU model and CPU features exposed to the guest. The only required value
is MODEL, which is a valid CPU model as known to libvirt.
Libvirt’s feature policy values force, require, optional, disable, or forbid, or with the shorthand ‘+feature' and ‘-feature‘, which equal ‘force=feature‘ and ‘disable=feature‘ respectively.
If exact CPU model is specified virt-install will automatically copy CPU features available on the host to mitigate recent CPU speculative execution side channel and Micro architectural Store Buffer Data security vulnerabilities.
This however will have some impact on performance and will break migration to hosts without security patches. In order to control this behaviour there is a secure parameter. Possible values are on and off, with on as the default. It is highly recommended to leave this enabled and ensure all virtualisation hosts have fully up to date microcode, kernel & virtualisation software installed.
Some examples:
--cpu core2duo,+x2apic,disable=vmxExpose the core2duo CPU model, force enable x2apic, but do not expose vmx.
--cpu hostExpose the host CPUs configuration to the guest. This enables the guest to take advantage of many of the host CPUs features (better performance), but may cause issues if migrating the guest to a host without an identical CPU.
--cpu host-model-onlyExpose the nearest host CPU model configuration to the guest. It is the best CPU which can be used for a guest on any of the hosts.
--cpu numa.cell0.memory=1234,numa.cell0.cpus=0-3,numa.cell1.memory=5678,numa.cell1.cpus=4-7Example of specifying two NUMA cells. This will generate XML like:
             <cpu>
               <numa>
                 <cell cpus="0-3" memory="1234"/>
                 <cell cpus="4-7" memory="5678"/>
               </numa>
             </cpu>
--cpu host-passthrough,cache.mode=passthroughExample of passing through the host CPU’s cache information.
Use --cpu=? to see a list of all available sub options. Complete details at https://libvirt.org/formatdomain.html#elementsCPU
--cputune OPTIONSTune CPU parameters for the guest. Configure which of the host’s physical CPUs the domain VCPU will be pinned to. Example invocation
--cputune vcpupin0.vcpu=0,vcpupin0.cpuset=0-3,vcpupin1.vcpu=1,vcpupin1.cpuset=4-7Use --cputune=? to see a list of all available sub options. Complete details at
https://libvirt.org/formatdomain.html#elementsCPUTuning
--security/--seclabel type=TYPE[,label=LABEL][,relabel=yes|no],...Configure domain seclabel domain settings. Type can be either ‘static’ or ‘dynamic’. ‘static’ configuration requires a security LABEL. Specifying LABEL without TYPE implies static configuration.
Use --security=? to see a list of all available sub options. Complete details at
https://libvirt.org/formatdomain.html#seclabel
--iothreads OPTIONSSpecify domain <iothreads> and/or <iothreadids> XML. For example, to configure
<iothreads>4</iothreads>, do:
--iothreads 4Use --iothreads=? to see a list of all available sub options. Complete details at
https://libvirt.org/formatdomain.html#elementsIOThreadsAllocation
--features FEAT=on|off,...Set elements in the guests XML on or off. Examples include acpi, apic, eoi, privnet, and hyperv features. Some examples:
--features apic.eoi=on Enable APIC PV EOI
--features hyperv.vapic.state=on,hyperv.spinlocks.state=off
Enable hypver VAPIC, but disable spinlocks
--features kvm.hidden.state==on
Allow the KVM hypervisor signature to be hidden from the guest
--features pvspinlock=on
Notify the guest that the host supports paravirtual spinlocks for example by exposing the pvticketlocks mechanism.
--features gic.version=2This is relevant only for ARM architectures. Possible values are “host” or version number.
--features smm.state=on
This enables System Management Mode of hypervisor. Some UEFI firmwares may require
this feature to be present. (QEMU supports SMM only with q35 machine type.)
Use --features=? to see a list of all available sub options. Complete details at
https://libvirt.org/formatdomain.html#elementsFeatures
--clock offset=OFFSET,TIMER_OPT=VAL,…
Configure the guest’s XML. Some supported options:
--clock offset=OFFSETSet the clock offset, ex. ‘utc’ or ‘localtime’
--clock TIMER_present=noDisable a boolean timer. TIMER here might be hpet, kvmclock, etc.
--clock TIMER_tickpolicy=VALSet a timer’s tickpolicy value. TIMER here might be rtc, pit, etc. VAL might be catchup, delay, etc. Refer to the libvirt docs for all values.
Use --clock=? to see a list of all available sub options. Complete details at
https://libvirt.org/formatdomain.html#elementsTime
--pm OPTIONSConfigure guest power management features. Example:
--pm suspend_to_memi.enabled=on,suspend_to_disk.enabled=offUse --pm=? to see a list of all available sub options. Complete details at
https://libvirt.org/formatdomain.html#elementsPowerManagement
–launchSecurity
--launch-security TYPE[,OPTS]Enable launch security for the guest, e.g. AMD SEV.
Use --launch-security=? to see a list of all available sub options. Complete details
at https://libvirt.org/formatdomain.html#launchSecurity. Example invocations:
# This will use a default policy 0x03
# No dhCert provided, so no data can be exchanged with the SEV firmware
--launchSecurity sev# Explicit policy 0x01 – disables debugging, allows guest key sharing
--launchSecurity sev,policy=0x01Provide the session blob obtained from the SEV firmware.
Provide dhCert to open a secure communication channel with SEV firmware.
--launchSecurity sev,session=BASE64SESSIONSTRING,dhCert=BASE64DHCERTSTRINGSEV has further implications on usage of virtio devices, so refer to EXAMPLES section
to see a full invocation of virt-install with --launchSecurity.
INSTALLATION OPTIONS
-c, --cdrom PATHISO file or CDROM device to use for VM install media. After install, the the virtual CDROM device will remain attached to the VM, but with the ISO or host path media ejected.
-l, --location OPTIONSDistribution tree installation source. virt-install can recognise certain distribution trees and fetches a boo-table kernel/initrd pair to launch the install.
--location allows things like --extra-args for kernel arguments, and using --initrd-inject. If you want to use those options with CDROM media, you can pass the ISO to --location as well which works for some, but not all, CDROM media.
The “LOCATION” can take one of the following forms:
https://host/pathAn HTTP server location containing an installable distribution image.
ftp://host/pathAn FTP server location containing an installable distribution image.
ISO: Probe the ISO and extract files using ‘isoinfo‘
DIRECTORY: Path to a local directory containing an installable distribution image. Note that the directory will not be accessible by the guest after initial boot, so the OS installer will need another way to access the rest of the install media.
Some distro specific url samples:
- Fedora/Red Hat Based: https://download.fedoraproject.org/pub/fedora/linux/releases/29/Server/x86_64/os
- Debian: https://ftp.us.debian.org/debian/dists/stable/main/installer-amd64/
- Ubuntu: https://us.archive.ubuntu.com/ubuntu/dists/wily/main/installer-amd64/
- Suse: https://download.opensuse.org/pub/opensuse/distribution/leap/42.3/repo/oss/
Additionally, –location can take ‘kernel’ and ‘initrd’ sub options. These paths relative to the specified location URL/ISO that allow selecting specific files for kernel/initrd within the install tree. This can be useful if virt-install/ libosinfo doesn’t know where to find the kernel in the specified --location.
For example, if you have an ISO that libosinfo doesn’t know about called my-unknown.iso, with a kernel at ‘kernel/fookernel’ and initrd at ‘kernel/fooinitrd’, you can make this work with:
--location my-unknown.iso,kernel=kernel/fookernel,initrd=kernel/fooinitrd--pxeInstall from PXE. This just tells the VM to boot off the network for the first boot.
--importSkip the OS installation process, and build a guest around an existing disk image. The device used for booting is the first device specified via --disk or --filesystem.
-x, --extra-argsSyntax: -x, --extra-args KERNELARGS
Additional kernel command line arguments to pass to the installer when performing a guest install from --location. One common usage is specifying an anaconda kickstart file for automated installs, such as --extra-args "ks=https://myserver/my.ks"
--initrd-injectSyntax: --initrd-inject PATH
Add PATH to the root of the initrd fetched with --location. This can be used to run an automated install without requiring a network hosted kick‐ start file: --initrd-inject=/path/to/my.ks --extra-args "ks=file:/my.ks“
--installThis is a larger entry point for various types of install operations. The command has multiple sub-arguments, similar to --disk and friends. This option is strictly for VM install operations, essentially configuring the first boot.
The simplest usage to ex: install fedora29 is:
--install fedora29And virt-install will fetch a --location URL from libosinfo, and populate defaults from there.
Available sub-options:
os= This is os install option described above. The explicit way to specify that would be --install os=fedora29 . os= is the default option if none is specified.
kernel=, initrd=
Specify a kernel and initrd pair to use as install media. They are copied into a temporary location before booting the VM, so they can be combined with --initrd-inject and your source media will not be altered. Media will be uploaded to a remote connection if required.
Example case using local file-system paths: --install ernel=/path/to/kernel,initrd=/path/to/initrd
Example using network paths. Kernel/initrd will be downloaded locally first, then passed to the VM as local filesystem paths: --install kernel=https://127.0.0.1/tree/kernel,initrd=https://127.0.0.1/tree/initrd
kernel_args=, kernel_args_overwrite=yes|no
Specify install time kernel arguments (libvirt XML). These can be combine with ex: kernel/initrd options, or --location media. By default, kernel_args is just like --extra-args, and will append to the arguments that virt-install will try to set by default for most --location installs. If you want to override the virt-install default, additionally specify kernel_args_overwrite=yes
bootdev=
Specify the install bootdev (hd, cdrom, floppy, network) to boot off of for the install phase. This maps to libvirt XML.
If you want to install off a cdrom or network, it’s probably simpler and more backwards compatible to just use --cdrom or --pxe , but this options gives fine grained control over the install process if needed.
no_install=yes|no
Tell virt-install that there isn’t actually any install happening, and you just want to create the VM. --import is just an alias for this, as is specifying --boot without any other install options. The deprecated --live option is the same as ‘--cdrom $ISO --install no_install=yes‘
–reinstall DOMAIN
Reinstall an existing VM. DOMAIN can be a VM name, UUID, or ID number. virt-install will fetch the domain XML from libvirt, apply the specified install config changes, boot the VM for the install process, and then revert to roughly the same starting XML.
Only install related options are processed, all other VM configuration options like --name, --disk, etc. are completely ignored.
If --reinstall is used with --cdrom, an existing CDROM attached to the VM will be used if one is available, otherwise a permanent CDROM device will be added.
–unattended
Syntax: --unattended [OPTIONS]
Perform an unattended install using libosinfo’s install script support. This is essentially a database of auto install scripts for various distros: Red Hat kickstarts, Debian installer scripting, Windows unattended installs, and potentially others. The simplest invocation is to combine it with --install like:
--install fedora29 --unattendedA Windows install will look like
--cdrom /path/to/my/windows.iso --unattendedSub options are:
- profile= Choose which libosinfo unattended profile to use. Most distros have a ‘desktop’ and a ‘jeos’ profile. virt-install will default to ‘desktop’ if this is unspecified.
- admin-password-file= A file used to set the VM OS admin/root password from. This option can be used either as “
admin-password-file=/path/to/password-file” or as “admin-password-file=/dev/fd/n“, being n the file descriptor of the password-file. Note that only the first line of the file will be considered, including any whitespace characters and excluding new-line. - user-login= The user login name to be used in th VM. virt-install will default to your current host username if this is unspecified. Note that when running virt-install as “
root“, this option must be specified. - user-password-file= A file used to set the VM user password. This option can be used either as “
user-password-file=/path/to/password-file” or as “user-password-file=/dev/fd/n“, being n the file descriptor of the password-file. The username is either the user-login specified or your current host username. Note that only the first line of the file will be considered, including any white space characters and excluding new-line. - product-key= Set a Windows product key.
–cloud-init
Pass cloud-init metadata to the VM. A cloud-init NoCloud ISO file is generated, and attached to the VM as a CDROM device. The device is only attached for the first boot. This option is particularly useful for distro cloud images, which have locked login accounts by default; --cloud-init provides the means to initialise those login accounts, like setting a root password.
The simplest invocation is just plain --cloud-init with no suboptions; this maps to --cloud-init root-password-generate=on,disable=on. See those suboptions for explanation of how they work.
Sub options are:
- root-password-generate=on Generate a new root password for the VM. When used, virt-install will print the generated password to the console, and pause for 10 seconds to give the user a chance to notice it and copy it.
- disable=on Disable cloud-init in the VM for subsequent boots. Without this,
cloud-initmay reset auth on each boot. - root-password-file= A file used to set the VM root password from. This option can be used either as “
root-password-file=/path/to/password-file” or as “root-password-file=/dev/fd/n“, being n the file descriptor of the password-file. Note that only the first line of the file will be considered, including any white space characters and excluding new-line. - meta-data= Specify a
cloud-initmeta-data file to add directly to the iso. All other meta-data configuration options on the--cloud-initcommand line are ignored. - user-data= Specify a cloud-init user-data file to add directly to the iso. All other user-data configuration options on the
--cloud-initcommand line are ignored. - ssh-key= Specify a public key to inject into the guest, providing ssh access to the unprivileged account. Example:
ssh-key=/home/user/.ssh/id_rsa.pub
–boot
Syntax: --boot BOOTOPTS
Optionally specify the post-install VM boot configuration. This option allows specifying a boot device order, permanently booting off kernel/initrd with option kernel arguments, and enabling a BIOS boot menu (requires libvirt 0.8.3 or later)
–boot can be specified in addition to other install options (such as --location, --cdrom, etc.) or can be specified on its own. In the latter case, behaviour is similar to the --import install option: there is no ‘install’ phase, the guest is just created and launched as specified.
Some examples:
--boot cdrom,fd,hd,networkSet the boot device priority as first cdrom, first floppy, first harddisk, network PXE boot.
--boot kernel=KERNEL,initrd=INITRD,kernel_args="console=/dev/ttyS0"Have guest permanently boot off a local kernel/initrd pair, with the specified kernel options.
--boot kernel=KERNEL,initrd=INITRD,dtb=DTBHave guest permanently boot off a local kernel/initrd pair with an external device tree binary. DTB can be required for some non-x86 configurations like ARM or PPC
--boot loader=BIOSPATHUse BIOSPATH as the virtual machine BIOS.
--boot bootmenu.enable=on,bios.useserial=onEnable the bios boot menu, and enable sending bios text output over serial console.
--boot init=INITPATHPath to a binary that the container guest will init. If a root --filesystem has been specified, virt-install will default to /sbin/init, otherwise will default to /bin/sh.
--boot uefiConfigure the VM to boot from UEFI. In order for virt-install to know the correct UEFI parameters, libvirt needs to be advertising known UEFI binaries via domcapabilities XML, so this will likely only work if using properly configured distro packages.
--boot loader=/.../OVMF_CODE.fd,loader.readonly=yes,loader.type=pflash,nvram.template=/.../OVMF_VARS.fd,loader_secure=noSpecify that the virtual machine use the custom OVMF binary as boot firmware, mapped as a virtual flash chip. In addition, request that libvirt instantiate the VM-specific UEFI varstore from the custom “/…/OVMF_VARS.fd” varstore template. This is the recommended UEFI setup,
and should be used if --boot uefi doesn’t know about your UEFI binaries. If your UEFI firmware supports Secure boot feature you can enable it via loader_secure.
Use --boot=? to see a list of all available sub options. Complete details at https://libvirt.org/formatdomain.html#elementsOS
–idmap
Syntax: --idmap OPTIONS
If the guest configuration declares a UID or GID mapping, the ‘user’ namespace will be enabled to apply these. A suitably configured UID/GID mapping is a prerequisite to make containers secure, in the absence of sVirt confinement.
--idmap can be specified to enable user namespace for LXC containers. Example:
--idmap uid.start=0,uid.target=1000,uid.count=10,gid.start=0,gid.target=1000,gid.count=10Use --idmap=? to see a list of all available sub options. Complete details at https://libvirt.org/formatdomain.html#elementsOSContainer
GUEST OS OPTIONS
--os-variant, --osinfoSyntax: --os-variant [OS_VARIANT|OPT1=VAL1,…]
Optimize the guest configuration for a specific operating system (ex. ‘fedora29’, ‘rhel7’, ‘win10’). While not required, specifying this options is HIGHLY RECOMMENDED, as it can greatly increase performance by specifying virtio among other guest tweaks.
The simplest usage is --os-variant OS-NAME, for example --os-variant fedora32. –os-variant supports explicit suboption syntax as well:
- name=, short-id=
The OS name/short-id from libosinfo. Examples: fedora32, win10 - id= The full URL style libosinfo ID. For example, name=win10 is the same as id=http://microsoft.com/win/10
- detect=on|off
Whethervirt-installshould attempt OS detection from the specified install media. Detection is presently only attempted for URL and CDROM installs, and is not 100% reliable. - require=on|off If on,
virt-installerrors if no OS value is set or detected.
Some interesting examples:
--os-variant detect=on,require=onThis tells virt-install to attempt detection from install media, but explicitly fail if that does not succeed. This will ensure your virt-install invocations don’t fallback to a poorly performing config
--os-variant detect=on,name=OSNAMEAttempt OS detection from install media, but if that fails, use OSNAME as a fallback.
By default, virt-install will do--os-variant detect=on,name=generic, using the detected OS if found, and falling back to the stub generic value otherwise, and printing a warning.
If any manual --os-variant value is specified, the default is all settings off or unset.
Use the command “osinfo-query os” to get the list of the accepted OS variant names.
STORAGE OPTIONS
–disk
Syntax: --disk OPTIONS
Specifies media to use as storage for the guest, with various options. The general format of a disk string is --disk opt1=val1,opt2=val2,…
The simplest invocation to create a new 10G disk image and associated disk device:
--disk size=10virt-install will generate a path name, and place it in the default image location for the hypervisor. To specify media, the command can either be:
--disk /some/storage/path[,opt1=val1]...Or explicitly specify one of the following arguments:
- path A path to some storage media to use, existing or not. Existing media can be a file or block device. Specifying a non-existent path implies attempting to create the new storage, and will require specifying a ‘size’ value. Even for remote hosts,
virt-installwill try to use libvirt storage APIs to automatically create the given path.
If the hypervisor supports it, path can also be a network URL, like https://example.com/some-disk.img . For network paths, they hypervisor will directly access the storage, nothing is downloaded locally. - pool An existing libvirt storage pool name to create new storage on. Requires specifying a ‘size’ value.
- vol An existing libvirt storage volume to use. This is specified as ‘poolname/volname’.
Options that apply to storage creation:
- size size (in GiB) to use if creating new storage.
- sparse whether to skip fully allocating newly created storage. Value is ‘yes’ or ‘no’. Default is ‘yes’ (do not fully allocate) unless it isn’t supported by the underlying storage type.
- The initial time taken to fully-allocate the guest virtual disk (sparse=no) will be usually balanced by faster install times inside the guest. Thus use of this option is recommended to ensure consistently high performance and to avoid I/O errors in the guest should the host filesystem fill up.
- format Disk image format. For file volumes, this can be ‘raw’, ‘qcow2’, ‘vmdk’, etc. See format types in https://libvirt.org/storage.html for pos‐
sible values. This is often mapped to the driver_type value as well. - If not specified when creating file images, this will default to ‘qcow2’.
- If creating storage, this will be the format of the new image. If using an existing image, this overrides libvirt’s format auto-detection.
- backing_store
Path to a disk to use as the backing store for the newly created image. - backing_format
Disk image format of backing_store
Some example device configuration suboptions:
- device Disk device type. Example values are be ‘cdrom’, ‘disk’, ‘lun’ or ‘floppy’. The default is ‘disk’.
- boot.order
Guest installation with multiple disks will need this parameter to boot correctly after being installed. A boot.order parameter will take values 1,2,3,… Devices with lower value has higher priority. This option applies to other boo-table device types as well. - target.bus** or *bus
Disk bus type. Example values are be ‘ide’, ‘sata’, ‘scsi’, ‘usb’, ‘virtio’ or ‘xen’. The default is hypervisor dependent since not all hypervisors support all bus types.
- readonly Set drive as readonly (takes ‘on’ or ‘off’)
- shareable Set drive as shareable (takes ‘on’ or ‘off’)
- cache The cache mode to be used. The host pagecache provides cache memory. The cache value can be ‘none’, ‘writethrough’, ‘directsync’, ‘unsafe’ or ‘writeback’. ‘writethrough’ provides read caching. ‘writeback’ provides read and write caching. ‘directsync’ bypasses the host page
cache. ‘unsafe’ may cache all content and ignore flush requests from the guest. - driver.discard Whether discard (also known as “trim” or “unmap”) requests are ignored or passed to the filesystem. The value can be either “unmap” (allow the discard request to be passed) or “ignore” (ignore the discard request). Since 1.0.6 (QEMU and KVM only)
- driver.name Driver name the hypervisor should use when accessing the specified storage. Typically does not need to be set by the user.
- driver.type Driver format/type the hypervisor should use when accessing the specified storage. Typically does not need to be set by the user.
- driver.io Disk IO backend. Can be either “threads”, “native” or “io_uring”.
- driver.error_policy How guest should react if a write error is encountered. Can be one of “stop”, “ignore”, or “enospace”
- serial Serial number of the emulated disk device. This is used in linux guests to set /dev/disk/by-id symlinks. An example serial number might be: WD-WMAP9A966149
- source.startupPolicy It defines what to do with the disk if the source file is not accessible.
- snapshot Defines default behavior of the disk during disk snapshots.
See the examples section for some uses. This option deprecates -f/--file, -s/--file-size, --nonsparse, and --nodisks.
Use --disk=? to see a list of all available sub options. Complete details at https://libvirt.org/formatdomain.html#elementsDisks
–filesystem
Specifies a directory on the host to export to the guest. The most simple invocation is:
--filesystem /source/on/host,/target/point/in/guestWhich will work for recent QEMU and linux guest OS or LXC containers. For QEMU, the target point is just a mounting hint in sysfs, so will not be automatically mounted.
Some example sub-options:
- type The type or the source directory. Valid values are ‘mount’ (the default) or ‘template’ for OpenVZ templates.
- accessmode or mode The access mode for the source directory from the guest OS. Only used with QEMU and type=mount. Valid modes are ‘passthrough’ (the default), ‘mapped’, or ‘squash’. See libvirt domain XML documentation for more info.
- source The directory on the host to share.
- target The mount location to use in the guest.
NETWORKING OPTIONS
-w, --networkSyntax: -w, --network OPTIONS
Connect the guest to the host network. Examples for specifying the network type:
- bridge=BRIDGE Connect to a bridge device in the host called BRIDGE. Use this option if the host has static networking config & the guest requires full outbound and inbound connectivity to/from the LAN. Also use this if live migration will be used with this guest.
- network=NAME Connect to a virtual network in the host called NAME. Virtual networks can be listed, created, deleted using the virsh command line tool. In an unmodified install of libvirt there is usually a virtual network with a name of default. Use a virtual network if the host has dynamic networking (eg NetworkManager), or using wireless. The guest will be NATed to the LAN by whichever connection is active.
- type=direct,source=IFACE[,source.mode=MODE] Direct connect to host interface IFACE using macvtap.
- user Connect to the LAN using SLIRP. Only use this if running a QEMU guest as an unprivileged user. This provides a very limited form of NAT.
- none Tell virt-install not to add any default network interface.
If --network is omitted a single NIC will be created in the guest. If there is a bridge device in the host with a physical interface attached, that will be used for connectivity. Failing that, the virtual network called default will be used. This option can be specified multiple times to setup
more than one NIC.
Some example suboptions:
- model.type or model
Network device model as seen by the guest. Value can be any nic model supported by the hypervisor, e.g.: ‘e1000’, ‘rtl8139’, ‘virtio’, … - mac.address or mac
Fixed MAC address for the guest; If this parameter is omitted, or the value RANDOM is specified a suitable address will be randomly generated. For Xen virtual machines it is required that the first 3 pairs in the MAC address be the sequence ’00:16:3e’, while for QEMU or KVM virtual machines it must be ’52:54:00′. - filterref.filter
Controlling firewall and network filtering in libvirt. Value can be any nwfilter defined by the virsh ‘nwfilter’ subcommands. Available filters can be listed by running ‘virsh nwfilter-list’, e.g.: ‘clean-traffic‘, ‘no-mac-spoofing‘, … - virtualport.* options
Configure the device virtual port profile. This is used for 802.Qbg, 802.Qbh, midonet, and openvswitch config.
Use --network=? to see a list of all available sub options. Complete details at https://libvirt.org/formatdomain.html#elementsNICS
This option deprecates -m/–mac, -b/--bridge, and --nonetworks
GRAPHICS OPTIONS
If no graphics option is specified, "virt-install"will try to select the appropriate
graphics if the DISPLAY environment variable is set, otherwise ‘--graphics none‘ is used.
–graphics
Syntax: --graphics TYPE,opt1=arg1,opt2=arg2,…
Specifies the graphical display configuration. This does not configure any virtual hardware, just how the guest’s graphical display can be accessed. Typically the user does not need to specify this option, virt-install will try and choose a useful default, and launch a suitable connection.
General format of a graphical string is
--graphics TYPE,opt1=arg1,opt2=arg2,...For example:
--graphics vnc,password=foobarSome supported TYPE values:
- vnc Setup a virtual console in the guest and export it as a VNC server in the host. Unless the port parameter is also provided, the VNC server will run on the first free port number at 5900 or above. The actual VNC display allocated can be obtained using the vncdisplay command to
virsh (orvirt-viewer(1) can be used which handles this detail for the use). - spice Export the guest’s console using the Spice protocol. Spice allows advanced features like audio and USB device streaming, as well as improved graphical performance.
Using spice graphic type will work as if those arguments were given:
--video qxl --channel spicevmc- none No graphical console will be allocated for the guest. Guests will likely need to have a text console configured on the first serial port in the guest (this can be done via the
--extra-argsoption). The command ‘virsh console NAME’ can be used to connect to the serial device.
Some supported suboptions:
- port Request a permanent, statically assigned port number for the guest console. This is used by ‘vnc’ and ‘spice’
- tlsPort Specify the spice tlsport.
- websocket Request a VNC WebSocket port for the guest console.
If -1 is specified, the WebSocket port is auto-allocated.
This is used by ‘vnc’ and ‘spice’
- listen Address to listen on for VNC/Spice connections. Default is typically 127.0.0.1 (localhost only), but some hypervisors allow changing this globally (for example, the qemu driver default can be changed in /etc/libvirt/qemu.conf). Use 0.0.0.0 to allow access from other machines.
Use ‘none’ to specify that the display server should not listen on any port. The display server can be accessed only locally through libvirt unix socket (virt-viewer with --attach for instance).
Use ‘socket’ to have the VM listen on a libvirt generated unix socket path on the host filesystem.
This is used by ‘vnc’ and ‘spice’
- password Request a console password, required at connection time. Beware, this info may end up in virt-install log files, so don’t use an important password. This is used by ‘vnc’ and ‘spice’
- gl.enable Whether to use OpenGL accelerated rendering. Value is ‘yes’ or ‘no’. This is used by ‘spice’.
- gl.rendernode DRM render node path to use. This is used when ‘gl’ is enabled.
Use --graphics=? to see a list of all available sub options. Complete details at https://libvirt.org/formatdomain.html#elementsGraphics
This deprecates the following options: --vnc, --vncport, --vnclisten, -k/--keymap, –-sdl, --nographics
–autoconsole
Syntax: --autoconsole OPTIONS
Configure what interactive console virt-install will launch for the VM. This option is not required; the default behaviour is adaptive and dependent on how the VM is configured. But you can use this option to override the default choice.
–autoconsole graphical Use the graphical virt-viewer(1) as the interactive console
–autoconsole text Use the text mode virsh console as the interactive console.
–autoconsole none This is the same as –noautoconsole
–noautoconsole Don’t automatically try to connect to the guest console. Same as --autoconsole none
Note, virt-install exits quickly when this option is specified. If your command requested a multistep install, like --cdrom or --location, after the install phase is complete the VM will be shutoff, regardless of whether a reboot was requested in the VM. If you want the VM to be rebooted, virt-install must remain running. You can use ‘--wait‘ to keep virt-install alive even if –noautoconsole is specified.
VIRTUALIZATION OPTIONS
Options to override the default virtualization type choices.
-v, --hvmRequest the use of full virtualisation, if both para & full virtualisation are available on the host. This parameter may not be available if connecting to a Xen hypervisor on a machine without hardware virtualisation support. This parameter is implied if connecting to a QEMU based hypervisor.
-p, --paravirtThis guest should be a paravirtualized guest. If the host supports both para & full virtualisation, and neither this parameter nor the “--hvm” are specified, this will be
assumed.
--containerThis guest should be a container type guest. This option is only required if the hypervisor supports other guest types as well (so for example this option is the default behaviour for LXC and OpenVZ, but is provided for completeness).
--virt-typeThe hypervisor to install on. Example choices are kvm, qemu, or xen. Available options are listed via ‘virsh capabilities’ in the <domain> tags.
This deprecates the --accelerate option, which is now the default behaviour. To install
a plain QEMU guest, use ‘--virt-type qemu‘
DEVICE OPTIONS
All devices have a set of address.* options for configuring the particulars of the
device’s address on its parent controller or bus.
See “https://libvirt.org/formatdomain.html#elementsAddress” for details.
—controller
Syntax: --controller OPTIONS
Attach a controller device to the guest. TYPE is one of: ide, fdc, scsi, sata, virtio-serial, or usb.
Controller also supports the special values usb2 and usb3 to specify which version of the USB controller should be used (version 2 or 3).
Some example suboptions:
- model Controller model. These may vary according to the hypervisor and its version. Most commonly used models are e.g. auto ,
virtio-scsifor the scsi controller, ehci or none for the usb controller.
Use --controller=? to see a list of all available sub options. Complete details at
https://libvirt.org/formatdomain.html#elementsControllers
–input
Syntax: --input OPTIONS
Attach an input device to the guest. Example input device types are mouse, tablet, or keyboard.
Use --input=? to see a list of all available sub options. Complete details at
https://libvirt.org/formatdomain.html#elementsInput
–hostdev, –host-device: Syntax: --hostdev, --host-device OPTIONS
Attach a physical host device to the guest. Some example values for HOSTDEV:
–hostdev pci_0000_00_1b_0: A node device name via libvirt, as shown by ‘virsh nodedev-list‘
–hostdev 001.003: USB by bus, device (via lsusb).
–hostdev 0x1234:0x5678: USB by vendor, product (via lsusb).
–hostdev 1f.01.02: PCI device (via lspci).
–hostdev wlan0,type=net: Network device (in LXC container).
–hostdev /dev/net/tun,type=misc: Character device (in LXC container).
–hostdev /dev/sdf,type=storage: Block device (in LXC container).
Use --hostdev=? to see a list of all available sub options. Complete details at
https://libvirt.org/formatdomain.html#elementsHostDev
–sound
Syntax: --sound MODEL
Attach a virtual audio device to the guest. MODEL specifies the emulated sound card model. Possible values are ich6, ich9, ac97, es1370, sb16, pcspk, or default. ‘default’ will try to pick the best model that the specified OS supports.
This deprecates the old --soundhw option. Use --sound=? to see a list of all available sub options. Complete details at https://libvirt.org/formatdomain.html#elementsSound
–watchdog
Syntax: --watchdog MODEL[,action=ACTION]
Attach a virtual hardware watchdog device to the guest. This requires a daemon and device driver in the guest. The watchdog fires a signal when the virtual machine appears to hung. ACTION specifies what libvirt will do when the watchdog fires. Values are:
- reset Forcefully reset the guest (the default)
- poweroff Forcefully power off the guest
- pause Pause the guest
- none Do nothing
- shutdown Gracefully shutdown the guest (not recommended, since a hung guest probably won’t respond to a graceful shutdown)
MODEL is the emulated device model: either i6300esb (the default) or ib700. Some examples:
–watchdog default: Use the recommended settings
–watchdog i6300esb,action=poweroff: Use the i6300esb with the ‘poweroff’ action
Use --watchdog=? to see a list of all available sub options. Complete details at
https://libvirt.org/formatdomain.html#elementsWatchdog
–serial
Syntax: --serial OPTIONS
Specifies a serial device to attach to the guest, with various options. The general format of a serial string is --serial type,opt1=val1,opt2=val2,…
--serial and --parallel devices share all the same options, unless otherwise noted. Some of the types of character device redirection are:
–serial pty
Pseudo TTY. The allocated pty will be listed in the running guests XML description.
--serial dev,path=HOSTPATHHost device. For serial devices, this could be /dev/ttyS0. For parallel devices, this could be /dev/parport0.
–serial file,path=FILENAME: Write output to FILENAME.
--serial tcp,host=HOST:PORT,source.mode=MODE,protocol.type=PROTOCOLTCP net console. MODE is either ‘bind’ (wait for connections on HOST:PORT) or ‘connect’ (send output to HOST:PORT), default is ‘bind’. HOST defaults to ‘127.0.0.1’, but PORT is required. PROTOCOL can be either ‘raw’ or ‘telnet’ (default ‘raw’). If ‘telnet’, the port acts like a telnet server or client. Some examples:
Wait for connections on any address, port 4567:
--serial tcp,host=0.0.0.0:4567Connect to localhost, port 1234:
--serial tcp,host=:1234,source.mode=connectWait for telnet connection on localhost, port 2222. The user could then connect interactively to this console via ‘telnet localhost 2222’:
--serial tcp,host=:2222,source.mode=bind,source.protocol=telnet--serial udp,host=CONNECT_HOST:PORT,bind_host=BIND_HOST:BIND_PORTDP net console. HOST:PORT is the destination to send output to (default HOST is ‘127.0.0.1’, PORT is required). BIND_HOST:BIND_PORT is the optional local address to bind to (default BIND_HOST is 127.0.0.1, but is only set if BIND_PORT is specified). Some examples:
Send output to default syslog port (may need to edit /etc/rsyslog.conf accordingly):
--serial udp,host=:514Send output to remote host 192.168.10.20, port 4444 (this output can be read on the remote host using ‘nc -u -l 4444’):
--serial udp,host=192.168.10.20:4444--serial unix,path=UNIXPATH,mode=MODE Unix socket, see unix(7). MODE has similar behaviour and defaults as --serial tcp,mode=MODE
Use --serial=? to see a list of all available sub options. Complete details at
https://libvirt.org/formatdomain.html#elementsCharSerial
–parallel
Syntax: --parallel OPTIONS
Specify a parallel device. The format and options are largely identical to serial. Use --parallel=? to see a list of all available sub options. Complete details at
https://libvirt.org/formatdomain.html#elementsCharParallel
–channel
Specifies a communication channel device to connect the guest and host machine. This option uses the same options as --serial and –parallel for specifying the host/source end of the channel. Extra ‘target’ options are used to specify how the guest machine sees the channel.
Some of the types of character device redirection are:
--channel SOURCE,target.type=guestfwd,target.address=HOST:PORTCommunication channel using QEMU usermode networking stack. The guest can connect to the channel using the specified HOST:PORT combination.
--channel SOURCE,target.type=virtio[,target.name=NAME]Communication channel using virtio serial (requires 2.6.34 or later host and guest). Each instance of a virtio --channel line is exposed in the guest as /dev/vport0p1, /dev/vport0p2, etc. NAME is optional metadata, and can be any string, such as org.linux-kvm.virtioport1. If specified, this will be exposed in the guest at /sys/class/virtio-ports/vport0p1/NAME
--channel spicevmc,target.type=virtio[,target.name=NAME]Communication channel for QEMU spice agent, using virtio serial (requires 2.6.34 or later host and guest). NAME is optional metadata, and can be any string, such as the default com.redhat.spice.0 that specifies how the guest will see the channel.
Use --channel=? to see a list of all available sub options. Complete details at
https://libvirt.org/formatdomain.html#elementsCharChannel
—console
Connect a text console between the guest and host. Certain guest and hypervisor combinations can automatically set up a getty in the guest, so an out of the box text login can be provided (target_type=xen for xen paravirt guests, and possibly target_type=virtio in the future).
Example:
--console pty,target.type=virtioConnect a virtio console to the guest, redirected to a PTY on the host. For supported guests, this exposes /dev/hvc0 in the guest. See https://fedoraproject.org/wiki/Features/VirtioSerial for more info. virtio console requires libvirt 0.8.3 or later.
Use --console=? to see a list of all available sub options. Complete details at
https://libvirt.org/formatdomain.html#elementsCharConsole
—video
Syntax: --video OPTIONS
Specify what video device model will be attached to the guest. Valid values for VIDEO are hypervisor specific, but some options for recent kvm are cirrus, vga, qxl, virtio, or vmvga (vmware). Use --video=? to see a list of all available sub options. Complete details at https://libvirt.org/formatdomain.html#elementsVideo
–smartcard
Syntax: --smartcard MODE[,OPTIONS]
Configure a virtual smartcard device.
Example MODE values are host, host-certificates, or passthrough. Example suboptions include:
- type Character device type to connect to on the host. This is only applicable for passthrough mode.
An example invocation:
--smartcard passthrough,type=spicevmcUse the smartcard channel of a SPICE graphics device to pass smartcard info to the guest
Use --smartcard=? to see a list of all available sub options. Complete details at
https://libvirt.org/formatdomain.html#elementsSmartcard
–redirdev
Syntax: --redirdev BUS[,OPTIONS]
Add a redirected device. Example suboptions:
- type The redirection type, currently supported is tcp or spicevmc .
- server The TCP server connection details, of the form ‘server:port’.
Examples invocations:
--redirdev usb,type=tcp,server=localhost:4000Add a USB redirected device provided by the TCP server on ‘localhost’ port 4000.
--redirdev usb,type=spicevmcAdd a USB device redirected via a dedicated Spice channel.
Use --redirdev=? to see a list of all available sub options. Complete details at
https://libvirt.org/formatdomain.html#elementsRedir
–memballoon
Syntax: --memballoon MODEL[,OPTIONS]
Attach a virtual memory balloon device to the guest. If the memballoon device needs to be explicitly disabled, MODEL=’none’ is used.
MODEL is the type of memballoon device provided. The value can be ‘virtio‘, ‘xen‘ or ‘none‘. Some examples:
–memballoon virtio: Explicitly create a ‘virtio’ memballoon device.
–memballoon none: Disable the memballoon device.
Use --memballoon=? to see a list of all available sub options. Complete details at
https://libvirt.org/formatdomain.html#elementsMemBalloon
–tpm
Syntax: --tpm TYPE[,OPTIONS]
Configure a virtual TPM device. Examples:
–tpm /dev/tpm: Convenience option for passing through the hosts TPM.
–tpm emulator: Request an emulated TPM device.
Use --tpm=? to see a list of all available sub options. Complete details at
https://libvirt.org/formatdomain.html#elementsTpm
–rng
Syntax: --rng TYPE[,OPTIONS]
Configure a virtual RNG device.
Example TYPE values include random, egd or builtin.
Example invocations:
–rng /dev/urandom: Use the /dev/urandom device to get entropy data, this form implicitly uses the “random” model.
–rng builtin: Use the builtin rng device to get entropy data.
–rng egd,backend.source.host=localhost,backend.source.service=8000,backend.type=tcp: Connect to localhost to the TCP port 8000 to get entropy data.
Use --rng=? to see a list of all available sub options. Complete details at
https://libvirt.org/formatdomain.html#elementsRng
–panic
Syntax: --panic MODEL[,OPTS]
Attach a panic notifier device to the guest. For the recommended settings, use: --panic default
Use --panic=? to see a list of all available sub options. Complete details at
https://libvirt.org/formatdomain.html#elementsPanic
–memdev
Syntax: --memdev OPTS
Add a memory module to a guest which can be hotunplugged. To add a memdev you need to configure hotplugmemory and NUMA for a guest.
Use --memdev=? to see a list of all available sub options. Complete details at
https://libvirt.org/formatdomain.html#elementsMemory.
–vsock
Syntax: --vsock OPTS
Configure a vsock host/guest interface. A typical configuration would be.
--vsock cid.auto=yesUse --vsock=? to see a list of all available sub options. Complete details at
https://libvirt.org/formatdomain.html#vsock.
–iommu
Syntax: --iommu MODEL[,OPTS]
Add an IOMMU device to the guest. Use --iommu=? to see a list of all available options. Complete details at https://libvirt.org/formatdomain.html#elementsIommu.
MISCELLANEOUS OPTIONS
-h, --help Show the help message and exit
--version Show program’s version number and exit
--autostart Set the autostart flag for a domain. This causes the domain to be started on host boot up.
--transient Use –import or –boot and --transient if you want a transient libvirt VM. These VMs exist only until the domain is shut down or the host server is restarted. Libvirt forgets the XML configuration of the VM after either of these events. Note that the VM’s disks will not be deleted. See: https://wiki.libvirt.org/page/VM_lifecycle#Transient_guest_domains_vs_Persistent_guest_domains
–-destroy-on-exit When the VM console window is exited, destroy (force poweroff) the VM. If you combine this with –transient, this makes the virt-install command work similar to qemu, where the VM is shutdown when the console window is closed by the user.
–print-xml
Syntax: --print-xml [STEP]
Print the generated XML of the guest, instead of defining it. By default this WILL do storage creation (can be disabled with –dry-run). This option implies --quiet.
If the VM install has multiple phases, by default this will print all generated XML. If you want to print a particular step, use --print-xml 2 (for the second phase XML).
--noreboot Prevent the domain from automatically rebooting after the install has completed.
–wait
Syntax: --wait WAIT
Configure how virt-install will wait for the install to complete. Without this option, virt-install will wait for the console to close (not necessarily indicating the guest has shutdown), or in the case of –noautoconsole, simply kick off the install and exit.
Bare ‘--wait‘ or any negative value will make virt-install wait indefinitely. Any positive number is the number of minutes virt-install will wait. If the time limit is exceeded, virt-install simply exits, leaving the virtual machine in its current state.
–dry-run Proceed through the guest creation process, but do NOT create storage devices, change host device configuration, or actually teach libvirt about the guest. virt-install may still fetch install media, since this is required to properly detect the OS to install.
–check Enable or disable some validation checks. Some examples are warning about using a disk that’s already assigned to another VM (--check path_in_use=on|off), or warning about potentially running out of space during disk allocation (--check disk_size=on|off). Most checks are performed by default.
-q, –quiet Only print fatal error messages.
-d, –debug Print debugging information to the terminal when running the install process. The debugging information is also stored in ~/.cache/virt-manager/virt-install.log even if this parameter is omitted.
Virt-install Command Examples
The simplest invocation to interactively install a Fedora 29 KVM VM with recommended
defaults. virt-viewer(1) will be launched to graphically interact with the VM install.
# sudo virt-install --install fedora29Similar, but use libosinfo’s unattended install support, which will perform the fedora29
install automatically without user intervention:
# sudo virt-install --install fedora29 --unattendedInstall a Windows 10 VM, using 40GiB storage in the default location and 4096MiB of ram,
and ensure we are connecting to the system libvirtd instance:
# virt-install \
--connect qemu:///system \
--name my-win10-vm \
--memory 4096 \
--disk size=40 \
--os-variant win10 \
--cdrom /path/to/my/win10.iso
Install a CentOS 7 KVM from a URL, with recommended device defaults and default required
storag,e but specifically request VNC graphics instead of the default SPICE, and request 8
virtual CPUs and 8192 MiB of memory:
# virt-install \
--connect qemu:///system \
--memory 8192 \
--vcpus 8 \
--graphics vnc \
--os-variant centos7.0 \
--location http://mirror.centos.org/centos-7/7/os/x86_64/
Create a VM around an existing debian9 disk image:
# virt-install \
--import \
--memory 512 \
--disk /home/user/VMs/my-debian9.img \
--os-variant debian9
Start serial QEMU ARM VM, which requires specifying a manual kernel.
# virt-install \
--name armtest \
--memory 1024 \
--arch armv7l --machine vexpress-a9 \
--disk /home/user/VMs/myarmdisk.img \
--boot kernel=/tmp/my-arm-kernel,initrd=/tmp/my-arm-initrd,dtb=/tmp/my-arm-dtb,kernel_args="console=ttyAMA0 rw root=/dev/mmcblk0p3" \
--graphics none
Start an SEV launch security VM with 4GB RAM, 4GB+256MiB of hard_limit, with a couple of
virtio devices:
# virt-install \
--name foo \
--memory 4096 \
--boot uefi \
--machine q35 \
--memtune hard_limit=4563402 \
--disk size=15,target.bus=scsi \
--import \
--controller type=scsi,model=virtio-scsi,driver.iommu=on \
--controller type=virtio-serial,driver.iommu=on \
--network network=default,model=virtio,driver.iommu=on \
--rng driver,iommu=on \
--memballoon driver.iommu=on \
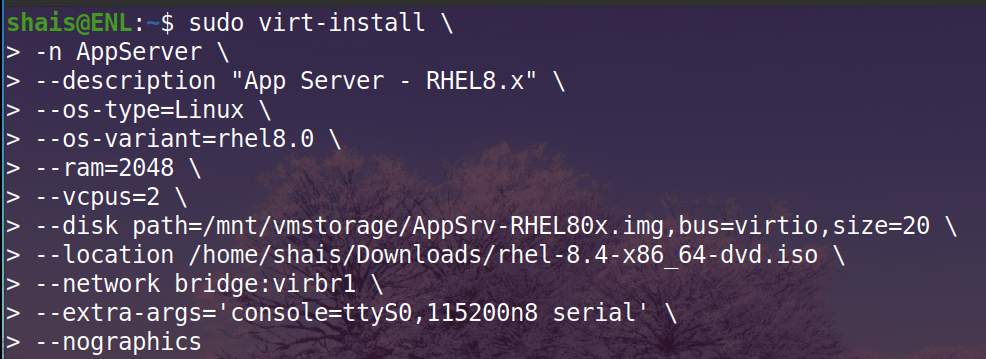
--launchSecurity sevLet’s create and launch a Red Hat Enterprise Linux 8.x installation using virt-install command.
virt-install \
-n AppServer \
--description "App Server - RHEL8.x" \
--os-type=Linux \
--os-variant=rhel8.0 \
--ram=2048 \
--vcpus=2 \
--disk path=/mnt/vmstorage/AppSrv-RHEL80x.img,bus=virtio,size=20 \
--location /home/shais/Downloads/rhel-8.4-x86_64-dvd.iso \
--network bridge:virbr1 \
--extra-args='console=ttyS0,115200n8 serial' \
--nographics
Read about how to create a virtual machine using virt-install command.
BUGS: Please see https://virt-manager.org/bugs
SEE ALSO: virsh(1), virt-clone(1), virt-manager(1), the project website https://virt-manager.org