
How to Install KVM on Ubuntu Server & Desktop 20.04
A clear step by step guide to install KVM on Ubuntu Server or Desktop. The (KVM) Kernel-based Virtual Machine is a virtualization module in the Linux kernel that allows the kernel to function as a hypervisor. KVM requires a processor with hardware virtualization extensions, such as Intel-VT or AMD-V. KVM has also been ported to other operating systems such as FreeBSD and illumos in the form of loadable kernel modules.
After completing the installation, KVM requires a little configuration if you want some conveniences like a graphical manager or the ability to allow VM guests to login from your network which we’ll cover it. Read more about KVM.
Install KVM on Ubuntu
We need to complete the following steps to having access to hypervisor services to run our virtual machines.
- Checking the prerequisites.
- Install KVM utilities and configure virt-manager.
- Configure network interfaces for bridged connection.
- Create a new virtual machine.
- Virtual machine initial configuration.
1. Checking Virtualization Prerequisites
Before everything, you should check and make sure whether the computer you are using is able to support virtualization or not.
egrep -c '(vmx|svm)' /proc/cpuinfo

The result should be 0 or greater than. If 0 it means that your CPU doesn’t support hardware virtualization. If 1 or more it does – but you still need to make sure that virtualization is enabled in the BIOS.
Alternatively, you can check with the kvm-ok command. To run the kvm-ok command, the cpu-checker should be installed on your system. In order to install the cpu-checker run $ sudo apt install cpu-checkercommand.
sudo kvm-ok
The kvm-ok command may provide an output like this:
INFO: /dev/kvm exists
KVM acceleration can be used
Excellent result. My system is ready for virtualization. But if you see :
INFO: Your CPU does not support KVM extensions
KVM acceleration can NOT be used
You can still run virtual machines, but it’ll be much slower without the KVM extensions.
2. Installing KVM
If the virtualization prerequisites checking has been done successfully, try to install KVM, virt-manager, bridge-utils and other dependencies, with the following command:
sudo apt install -y qemu qemu-kvm
libvirt-daemon libvirt-clients
bridge-utils virt-manager
- The
qemupackage (quick emulator) is an application that allows you to perform hardware virtualization. - The
qemu-kvmpackage is the main KVM package. - The
libvritd-daemonis the virtualization daemon. - The
bridge-utilspackage helps you create a bridge connection to allow other users to access a virtual machine other than the host system. - The
virt-manageris an application for managing virtual machines through a graphical user interface.

Done! let’s run the virtualization daemon libvritd-daemon. To do so, execute the following command.
$ sudo systemctl enable --now libvirtd
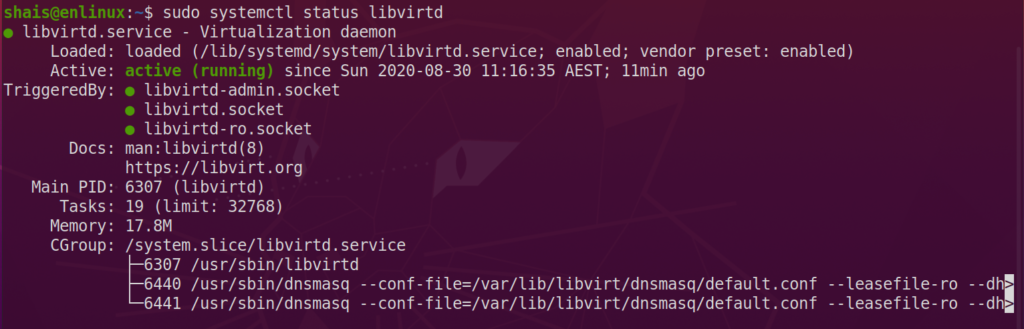
Now check the status of virtualization service.
$ sudo systemctl status libvirtd
Try to check the KVM modules loaded with the following command:
$ lsmod | grep -i kvm

Perfect! Everything is good and ready for creating a virtual machine. But before creating a virtual machine, let’s configure the network interface connections to get enable the inter networking for our virtual machines.
3. Configure network interfaces
To get connected your virtual machines to the internet or doing interconnect routing between VMs, you’ve to configure bridged networking on your system. The bridged connection tells the system that we want the connection to be bridged between all VMs and host machine.
First, check your network connection status with the following command.
nmcli device status
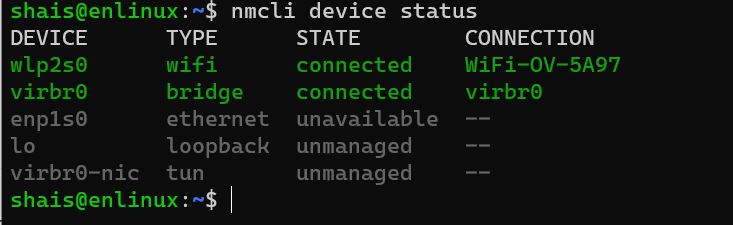
The virbr0 is the network connection I’ve plan to use it for network bridge on my laptop.
4. Create a Virtual Machine
To create a virtual machine we are using thevirt-installcommand-line tool with some parameters required for creating a virtual machine.
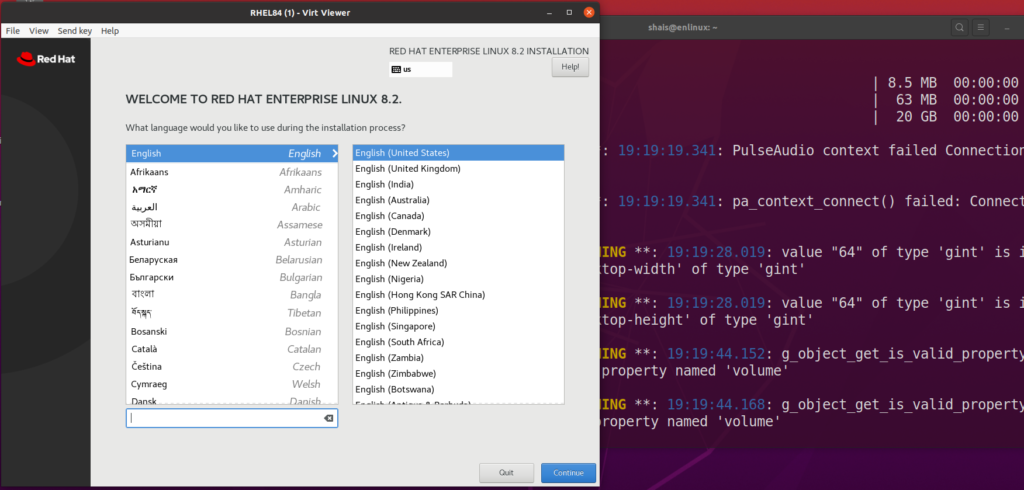
Lets create a Red Hat Enterprise 8.x virtual machine with the below command and variables.
sudo virt-install --name=RHEL82
--memory=4096 --vcpus=2 --disk path=/home/shais/vmlab/RHEL8.qcow2,size=20
--os-variant rhel7.5 --network bridge=virbr0
--extra-args=ro
--location=/home/shais/Desktop/rhel-8.2-x86_64-dvd.iso
- Name= Virtual Machine name.
- memory: Amount of specified RAM for the virtual machine.
- vcpu: virtual CPU.
- disk path: the location where the virtual machine disk is placed.
- os-variant: The model of the virtual machine template.
- network bridge: The network interface card connected to the virtual switch.
- location: The operating system images or iso file.
- extra-args: It should be read-only. Without this, you will face with the error of “DNF error: Error in POSTTRANS scriptlet in rpm package kernel-core“
The virt-install, installation snippet is below.
After running the process of operating system installation on created virtual machine, just follow up the process and complete the OS installation.
If you want to install Windows 10, use the below command.
sudo virt-install --name=Win10
--memory=4096 --vcpus=2 --disk path=/home/shais/vmlab/Win10,size=20
--os-variant win10 --network bridge=virbr0
--cdrom=/home/shais/Desktop/Win10.iso --graphic spice
Note: Windows 10 Enterprise and Windows servers are available for 180 days free. You can download from the below links, do practice and whatever you want.
Download Windows 10 — Download Windows Server 2019.
# virt-install \
   --name=guest-name \
   --os-type=windows \
   --network network=default \
   --disk path=path-to-disk,size=disk-size \
   --cdrom=path-to-install-disk \
   --graphics spice --ram=1024
5. Virtual Machine Initial Configuration
Finally, you should have a nice virtual machine. Test your internet connectivity with the ping command.